Android担当のd-ariakeです。
先日 弊社もFlutter採用致します! - Beta Computingブログ という記事の中で このような サンプルアプリを作り、紹介したかと思います。
今回はこのサンプルアプリと同じようなアプリをAndroidネイティブでも作ってみたので、設計の比較やポイントをご紹介したいと思います。
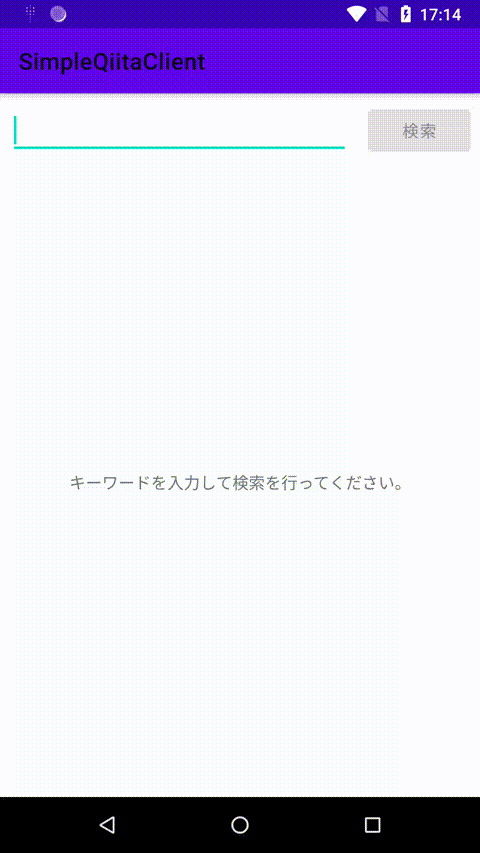
作ったアプリ
仕様は先日のものとほとんど変わっていません。
https://github.com/BetaComputing/SimpleQiitaClientAndroid
この同じような仕様のアプリをネイティブで作った際のポイントを軽く解説していきます。
ポイント
以下が今回説明するポイントとなります。
- UIの設計
- ネット上の画像のロード
- FlexboxLayoutの導入
UIの設計
Flutter版では BLoC パターンで設計していましたが、Androidネイティブ版では MVVM パターンで設計を行いました。
UIはxmlで記述し、ViewModelにUIを制御するための変更通知機構を持ったプロパティ (LiveData) をもたせ、データバインディングによってViewModelのプロパティの状態をUIに反映させています。
internal class MainViewModel(/* 省略 */) : ViewModel() {

    //  取得中かどうか
    private val isFetching: MutableLiveData<Boolean> = MutableLiveData(false)

    //  記事リスト
    private val _articleList = MutableLiveData<List<Article>>()
    val articleList: LiveData<List<Article>> = this._articleList

    //  検索キーワード
    val keyword: MutableLiveData<String> = MutableLiveData("")

    //  検索ボタンが有効かどうか
    val isSearchButtonEnabled: LiveData<Boolean> = MediatorLiveData<Boolean>().also {
        val onChanged = { it.value = this.isFetching.value == false && !this.keyword.value.isNullOrEmpty() }
        it.addSource(this.isFetching) { onChanged() }
        it.addSource(this.keyword) { onChanged() }
    }

    //  プログレスバーを表示するかどうか
    val isProgressBarVisible: LiveData<Boolean> = this.isFetching

    //  検索ボタンがクリックされたとき。
    fun onSearchButtonClicked() { /* 省略 */ }

    //  検索を行う。
    private suspend fun search(keyword: String) { /* 省略 */ }
}
<layout <!-- 省略 --> >

    <data> <!-- 省略 --> </data>

    <LinearLayout <!-- 省略 --> >

        <com.google.android.material.appbar.AppBarLayout />

        <LinearLayout <!-- 省略 --> >

            <androidx.constraintlayout.widget.ConstraintLayout <!-- 省略 -->>

                <com.google.android.material.textfield.TextInputEditText
                    android:id="@+id/keywordEditText"
                    <!-- 省略 -->
                    android:text="@={viewModel.keyword}" />

                <com.google.android.material.button.MaterialButton
                    android:id="@+id/searchButton"
                    <!-- 省略 -->
                    android:enabled="@{viewModel.isSearchButtonEnabled}"
                    android:onClick="@{() -> viewModel.onSearchButtonClicked()}" />

            </androidx.constraintlayout.widget.ConstraintLayout>

            <ProgressBar
                style="@style/Widget.AppCompat.ProgressBar.Horizontal"
                <!-- 省略 -->
                android:visibility="@{viewModel.isProgressBarVisible ? View.VISIBLE : View.INVISIBLE}" />

            <androidx.recyclerview.widget.RecyclerView <!-- 省略 --> />

        </LinearLayout>

    </LinearLayout>

</layout>
例えば、検索ボタンの活性の制御の場合です。
以下のコードで、取得処理中かどうかを表すLiveDataと検索キーワードを表すLiveDataから、検索ボタンの活性に変換しています。
val isSearchButtonEnabled: LiveData<Boolean> = MediatorLiveData<Boolean>().also {
    val onChanged = { it.value = this.isFetching.value == false && !this.keyword.value.isNullOrEmpty() }
    it.addSource(this.isFetching) { onChanged() }
    it.addSource(this.keyword) { onChanged() }
}
そして、xmlのデータバインディング構文を使ってボタンの android:enabled プロパティに反映させています。
<com.google.android.material.button.MaterialButton
    android:id="@+id/searchButton"
    android:enabled="@{viewModel.isSearchButtonEnabled}" />
Flutter版では RxDart の combineLatest2() で変換した Stream/Sink と StreamBuilder で実装していましたが、本質的には同じことをやっています。
このように主流の設計パターンが両者とも似ているので、Androidアプリ開発者がFlutterを学習するのはとても敷居が低いと感じました。
ネット上の画像のロード
Flutterではネット上の画像を表示させたいときは、単に
Image.network('URL')
というように書けばOKでした。
Androidネイティブには標準でそのような機能が用意されていので、Glide を使用しました。
Glide.with(context).load("画像のURL").into(imageView)
Glideを使うとこのように書くだけで、通信を行い、画像を反映させ、自動でキャッシュまで行ってくれます。
今回はデータバインディングを使った設計をしていたので、
@BindingAdapter("imageUrl")
fun ImageView.setImageUrl(url: String?) {
    Glide.with(this.context).load(url).into(this)
}
このような BindingAdapter を書いて、
<androidx.appcompat.widget.AppCompatImageView
    app:imageUrl="@{article.authorIconUrl}" />
xml上で画像の指定をできるようにしてみました。
このような処理はよく書くので、Flutterが公式で用意してくれているのはとてもありがたいですね。
FlexboxLayoutの導入
記事のタグを表示している部分は、動的に要素数を変えたり、横幅からはみ出た際に折り返しをしなくてはなりません。
Flutterだと Wrap を使うことで自動的に折り返しを設定してくれます。
Androidネイティブだとそのような機能が標準ではありません。
そこで FlexboxLayout というライブラリを使うことにしました。
使い方はとってもかんたんで <FlexboxLayout /> の下に <RecyclerView /> を入れてやり、FlexboxLayoutManager をセットしてやるだけです。
RecyclerView recyclerView = (RecyclerView) context.findViewById(R.id.recyclerview);
FlexboxLayoutManager layoutManager = new FlexboxLayoutManager(context);
layoutManager.setFlexDirection(FlexDirection.COLUMN);
layoutManager.setJustifyContent(JustifyContent.FLEX_END);
recyclerView.setLayoutManager(layoutManager);
引用元: https://github.com/google/flexbox-layout#flexboxlayoutmanager-within-recyclerview
しかし、Androidネイティブのリスト (RecyclerView) を扱おうと思うと、Adapterに関する部分のコードを書く必要があり、多少めんどくさいです。
そこで、コードの見通しを良くするために、カスタムViewを作ることにしました。
internal class TagList(/* 省略 */) : FlexboxLayout(/* 省略 */), TagClickedListener {
    internal var listener: TagClickedListener? = null
    private val adapter = Adapter(this)

    init {
        LayoutInflater.from(this.context).inflate(R.layout.tag_list, this, true)

        val layoutManager = FlexboxLayoutManager(this.context, FlexDirection.ROW)
        this.recyclerView.layoutManager = layoutManager
        this.recyclerView.adapter = this.adapter
    }

    internal fun setTags(tags: List<String>) { /* 省略 */ }
    override fun onTagClicked(tag: String) { /* 省略 */ }

    private inner class Adapter(private val parent: TagList = this) : RecyclerView.Adapter<BindingHolder>() {
        private val inflater: LayoutInflater by lazy { LayoutInflater.from(context) }
        var tags: List<String> = emptyList()

        override fun getItemCount(): Int = this.tags.size
        override fun onCreateViewHolder(parent: ViewGroup, viewType: Int): BindingHolder =
            BindingHolder(TagBinding.inflate(this.inflater, parent, false))
        override fun onBindViewHolder(holder: BindingHolder, position: Int) {
            holder.binding.tag = this.tags[position]
            holder.binding.listener = this.parent
            holder.binding.executePendingBindings()
        }
    }

    private class BindingHolder(val binding: TagBinding) : RecyclerView.ViewHolder(binding.root)
}

@BindingAdapter("tags")
internal fun TagList.setTags(tags: List<String>?) {
    if (tags != null) this.setTags(tags)
}

@BindingAdapter("onTagClicked")
internal fun TagList.setListener(listener: TagClickedListener?) {
    this.listener = listener
}
TagList というカスタムViewとそのBindingAdapterを生やし、
<TagList
    <!-- 省略 -->
    app:onTagClicked="@{tagClickedListener}"
    app:tags="@{article.tags}" />
このようにxml中で使えるようにしてみました。
Flutterだと数行で実現できたことですが、Androidネイティブでやろうとすると、ものすごく大変でした。
感想
UIに関して、シンプルなUIを組むことに限って言えば、Flutterだとものすごく簡単に感じました。
Androidネイティブの場合、ActivityとFragmentの概念や、ライフサイクルの理解と画面の再生成の対応など、知っておかなくてはならないことがたくさんあります。
Flutterだとそれらを意識せずに作れてしまうので、アプリ開発初学者に対する敷居もかなり低くなっていると思います。
当然、Android固有の機能であったり、一部のUIに関してはAndroidネイティブが必要ですし、ネイティブがすぐに不要になるとは思いませんが、今後はFlutterの選択肢も増えていくと思います。